Apothecary: Difference between revisions
No edit summary |
No edit summary |
||
| (18 intermediate revisions by 2 users not shown) | |||
| Line 3: | Line 3: | ||
|content= | |content= | ||
The Apothecary is the place where unwell and hypochondriac folk can go to get a cure for what ails them. | |||
Running an Apothecary requires plenty of herbs, flowers and monster parts. | |||
There are 3 crafting minigames avaialble in the Apothecary for making Powders (easy), Creams (fairly easy) and Potions (more complex and time-consuming). | |||
The amount of [[Reputation|REP]] and money that can be gained is potentially large, with a bit of effort (or a good worker). | |||
}} | |||
{{PageSection | |||
|title=Usage | |||
|content= | |||
Interact with the sign outside to open and close your store. The store will automatically close if you leave the region and have no | With enough Brass, the apothecary can be purchased by interacting with the [[#Ledger|ledger]] sitting on the shop counter. The Ledger only appears once you have met the Grandmasters in [[The Circle]] as part of the [[Seek the Grandmasters]] story. | ||
Once purchased the previous owner will leave, gifting you any items that were in stock at the time. These will be in your apothecary stock cupboard. | |||
Interact with the sign outside to open and close your store. The store will automatically close if you leave the region and have no worker employed. | |||
}} | }} | ||
| Line 17: | Line 27: | ||
You must ask what their problem is and use their symptom descriptions to try to work out what Traits they are afflicted with, then use your own estimations or the helpful Medical Tome to work out how to counter the things they want to fix. | You must ask what their problem is and use their symptom descriptions to try to work out what Traits they are afflicted with, then use your own estimations or the helpful Medical Tome to work out how to counter the things they want to fix. | ||
}} | }} | ||
| Line 28: | Line 37: | ||
</tr> | </tr> | ||
<tr class="table-row"><td>[[Queasy Does It]]</td><td>[[Vale]]</td><td>[[Candlewych Village]]</td></tr> | <tr class="table-row"><td>[[Queasy Does It]]</td><td>[[Vale]]</td><td><img class="locationIcon" src="https://wiki.kynseed.com/resources/assets/icons/locations/2.png">[[Candlewych Village]]</td></tr> | ||
<tr class="table-row"><td>[[High Fevers]]</td><td>[[Summerdown]]</td><td>[[Poppyhill]]</td></tr> | <tr class="table-row"><td>[[High Fevers]]</td><td>[[Summerdown]]</td><td><img class="locationIcon" src="https://wiki.kynseed.com/resources/assets/icons/locations/21.png">[[Poppyhill]]</td></tr> | ||
<tr class="table-row"><td>[[Bruised Foresight]]</td><td>[[Mellowfields]]</td><td>[[Mellowbrook]]</td></tr> | <tr class="table-row"><td>[[Bruised Foresight]]</td><td>[[Mellowfields]]</td><td><img class="locationIcon" src="https://wiki.kynseed.com/resources/assets/icons/locations/27.png">[[Mellowbrook]]</td></tr> | ||
<tr class="table-row"><td>[[Absolutely Balmy]]</td><td>[[Woemarsh]]</td><td>[[Copperpot]]</td></tr> | <tr class="table-row"><td>[[Absolutely Balmy]]</td><td>[[Woemarsh]]</td><td><img class="locationIcon" src="https://wiki.kynseed.com/resources/assets/icons/locations/42.png">[[Copperpot]]</td></tr> | ||
</table> | </table> | ||
</div> | </div> | ||
| Line 40: | Line 49: | ||
|content= | |content= | ||
The | The Ledger on your counter has tabs with various helpful pages for running your business | ||
===Accounts=== | ===Accounts=== | ||
| Line 46: | Line 55: | ||
Check | Check your profit and loss on a weekly/yearly level, and look at your previous transaction and Rep gains | ||
===Staff=== | ===Staff=== | ||
| Line 54: | Line 63: | ||
You can hire workers from here. You can change their pay and see their stamina. | You can hire workers from here. You can change their pay and see their stamina. | ||
To regain stamina, give them breaks or gift them food. A tired worker has their | To regain stamina, give them breaks or gift them food. A tired worker has their [[Stats]] affected. | ||
You can also see a worker's happiness level. Pay and stamina can affect this, as well as | You can also see a worker's happiness level. Pay and stamina can affect this, as well as [[Friendship]] level. | ||
An unhappy worker is | An unhappy worker is more discourteous to customers, affecting service reputation and will not gain exp. | ||
Increase their pay and look at their schedules to not overwork them. | |||
This page also allows you to fire an employee. | This page also allows you to fire an employee. | ||
| Line 72: | Line 82: | ||
You will gain | You will gain REP when a customer is pleased with the service. | ||
This fills in for the current region you are in and will give you a perk point when full. | This fills in for the current region you are in and will give you a perk point when full. | ||
| Line 78: | Line 88: | ||
Any further reputation will keep adding up and will spill into the next region. This means that customers will start to appear from that region as they have heard about your shop. | Any further reputation will keep adding up and will spill into the next region. This means that customers will start to appear from that region as they have heard about your shop. | ||
Once that region's | Once that region's REP has been filled, you again get a perk point, and the Rep spills into the next region. | ||
| Line 84: | Line 94: | ||
Any perk points gained can be spent on perks within the ledger. Every perk comes with a small description and many have multiple stages to upgrade. | Any perk points gained can be spent on perks within the ledger. Every [[Shop Perks|perk]] comes with a small description and many have multiple stages to upgrade. | ||
Your earned shop | Your earned shop REP adds to your Grandmaster total, building up your [[Renown]] levels. | ||
| Line 94: | Line 104: | ||
Once you have unlocked them with the Tinker in Tir Na Nog, you can specialise your shop which brings new perks. This page lets you view and unlock those perks. | Once you have unlocked them with the Tinker in [[Tir Na Nog]], you can [[Specialisation|specialise]] your shop which brings new perks. This page lets you view and unlock those perks. | ||
}} | }} | ||
| Line 104: | Line 114: | ||
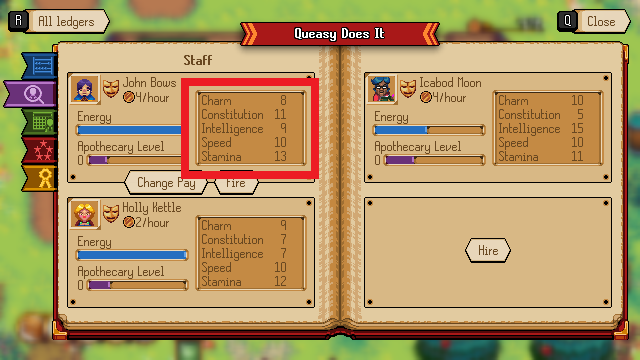
Each NPC has 10 stats, and 4 of these come into play when working in the apothecary. | Each NPC has 10 [[Traits, Talents & Stats|stats]], and 4 of these come into play when working in the apothecary. | ||
*Charm: Offsets and negative Rep from failing to cure the ailment effectively | |||
*Constitution: Affects the quality of work | |||
*Intelligence: Affects the quality of work | *Intelligence: Affects the quality of work | ||
*Speed: Affects the speed of service. Allowing you to serve more people in less time, as you can only deal with one customer at a time | |||
*Speed: Affects the speed of service. Allowing you to serve more people in less time, as you can only deal with one customer at a time | *Stamina: How long they can work before tiredness affects their other [[Stats]] | ||
*Stamina: How long they can work before tiredness affects their other | |||
The worker | The worker [[Stats]] are affected by age but additionally, gain experience to level up the [[Stats]] used in their current job. | ||
Certain recipes and items may also increase (or decrease) the worker's | Certain [[recipes]] and items may also increase (or decrease) the worker's [[Stats]]. | ||
}} | }} | ||
| Line 120: | Line 132: | ||
Prices in the apothecary are non-negotiable. You will be paid the going rate for each item based on type and quality. | Prices in the apothecary are non-negotiable. You will be paid the going rate for each item based on type and quality. | ||
You should look to get ingredients as cheap as possible to maximise your returns. | |||
Items sold in an Apothecary get more money than if sold at the [[Goods Store]]. | |||
}} | }} | ||
{{ImageBoxRight|image=Apothecary 03b Final.png}} | {{ImageBoxRight|image=Apothecary 03b Final.png}} | ||
{{ImageBoxRight|image=Apothecary 03bb Final.png}} | |||
{{PageSection | {{PageSection | ||
|title=Stock & Storage | |title=Stock & Storage | ||
| Line 134: | Line 149: | ||
===Red=== | ===Red=== | ||
Your storage space for each unit is limited. Once | Your storage space for each unit is limited. Once it's full you can't add any more items. | ||
===Yellow=== | ===Yellow=== | ||
Latest revision as of 14:31, 16 October 2025
Summary
The Apothecary is the place where unwell and hypochondriac folk can go to get a cure for what ails them. Running an Apothecary requires plenty of herbs, flowers and monster parts. There are 3 crafting minigames avaialble in the Apothecary for making Powders (easy), Creams (fairly easy) and Potions (more complex and time-consuming). The amount of REP and money that can be gained is potentially large, with a bit of effort (or a good worker).
Usage
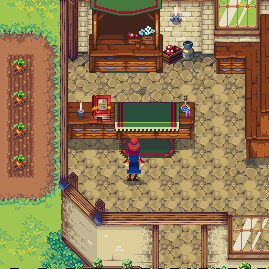
With enough Brass, the apothecary can be purchased by interacting with the ledger sitting on the shop counter. The Ledger only appears once you have met the Grandmasters in The Circle as part of the Seek the Grandmasters story.
Once purchased the previous owner will leave, gifting you any items that were in stock at the time. These will be in your apothecary stock cupboard.
Interact with the sign outside to open and close your store. The store will automatically close if you leave the region and have no worker employed.
Apothecaries
The aim of running an apothecary is to serve customers' needs, whether they are poorly, afflicted with more 'magical' maladies or just after a little pick-me-up.
You must ask what their problem is and use their symptom descriptions to try to work out what Traits they are afflicted with, then use your own estimations or the helpful Medical Tome to work out how to counter the things they want to fix.
| Name | Haven | Location |
|---|---|---|
| Queasy Does It | Vale | |
| High Fevers | Summerdown | |
| Bruised Foresight | Mellowfields | |
| Absolutely Balmy | Woemarsh |
Ledger
The Ledger on your counter has tabs with various helpful pages for running your business
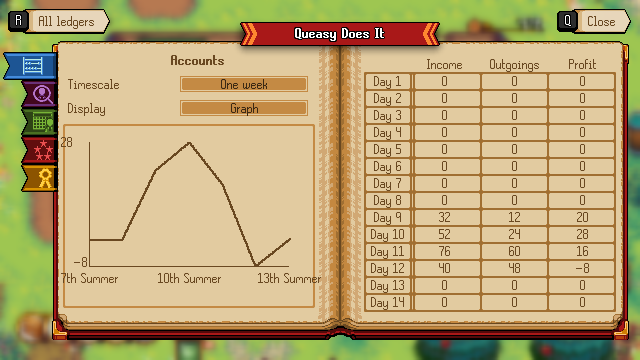
Accounts
Check your profit and loss on a weekly/yearly level, and look at your previous transaction and Rep gains
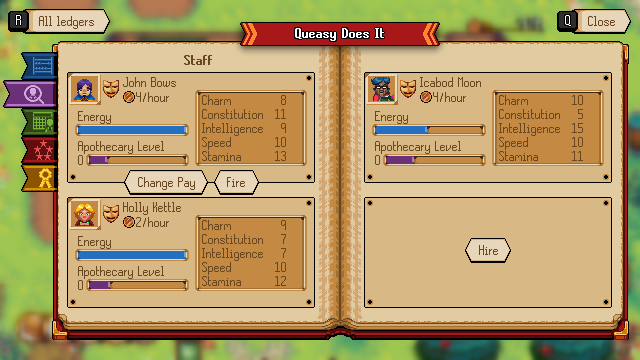
Staff
You can hire workers from here. You can change their pay and see their stamina.
To regain stamina, give them breaks or gift them food. A tired worker has their Stats affected.
You can also see a worker's happiness level. Pay and stamina can affect this, as well as Friendship level.
An unhappy worker is more discourteous to customers, affecting service reputation and will not gain exp. Increase their pay and look at their schedules to not overwork them.
This page also allows you to fire an employee.
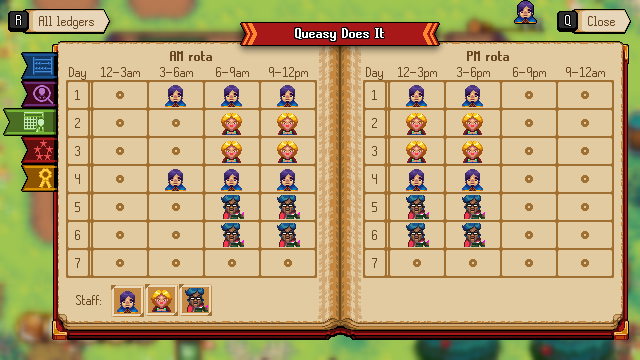
Rota
The employees' hours may be set here, and who works on which day.
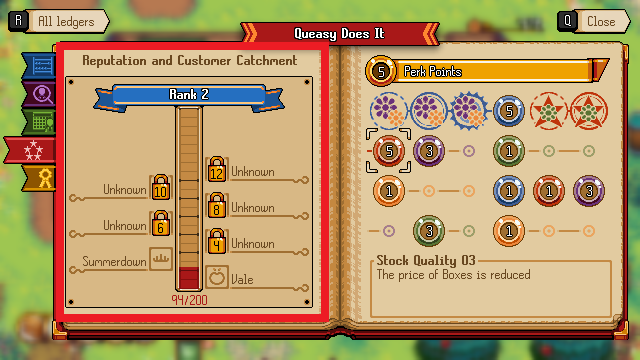
Reputation
You will gain REP when a customer is pleased with the service.
This fills in for the current region you are in and will give you a perk point when full.
Any further reputation will keep adding up and will spill into the next region. This means that customers will start to appear from that region as they have heard about your shop.
Once that region's REP has been filled, you again get a perk point, and the Rep spills into the next region.
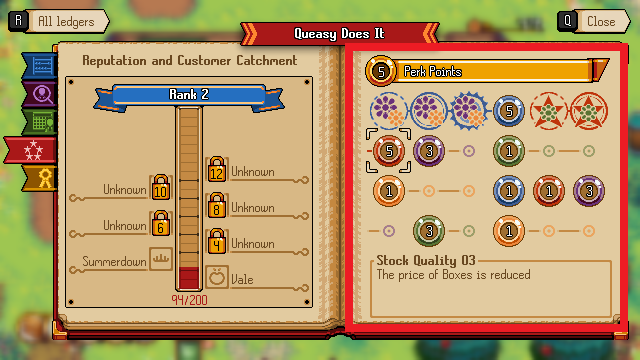
Any perk points gained can be spent on perks within the ledger. Every perk comes with a small description and many have multiple stages to upgrade.
Your earned shop REP adds to your Grandmaster total, building up your Renown levels.
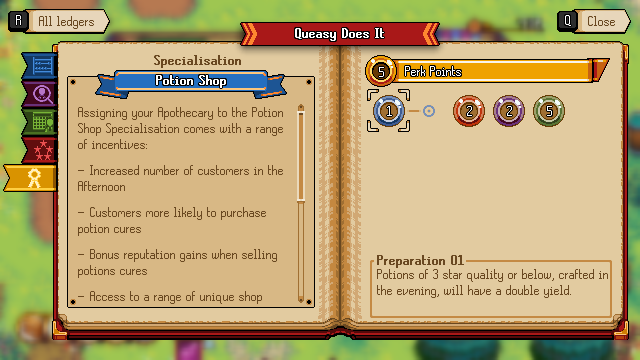
Specialisations
Once you have unlocked them with the Tinker in Tir Na Nog, you can specialise your shop which brings new perks. This page lets you view and unlock those perks.
Stats
Each NPC has 10 stats, and 4 of these come into play when working in the apothecary.
- Charm: Offsets and negative Rep from failing to cure the ailment effectively
- Constitution: Affects the quality of work
- Intelligence: Affects the quality of work
- Speed: Affects the speed of service. Allowing you to serve more people in less time, as you can only deal with one customer at a time
- Stamina: How long they can work before tiredness affects their other Stats
The worker Stats are affected by age but additionally, gain experience to level up the Stats used in their current job.
Certain recipes and items may also increase (or decrease) the worker's Stats.
Pricing
Prices in the apothecary are non-negotiable. You will be paid the going rate for each item based on type and quality. You should look to get ingredients as cheap as possible to maximise your returns. Items sold in an Apothecary get more money than if sold at the Goods Store.
Stock & Storage
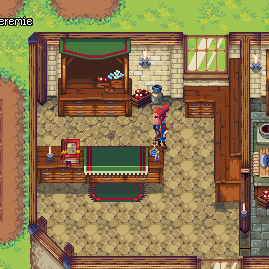
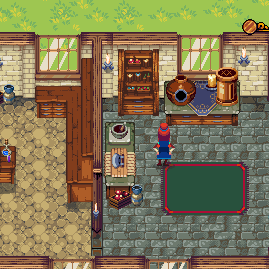
The large shelving unit in the top left of your apothecary is used for storing cures, allowing you quick access to a premixed cure and saving you from crafting a new one. The smaller unit on the right is for storing ingredients.
You can move items around and make sure you keep the supplies high for your workers to use.
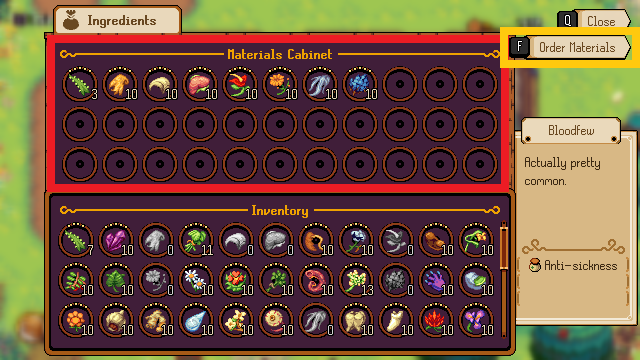
Red
Your storage space for each unit is limited. Once it's full you can't add any more items.
Yellow
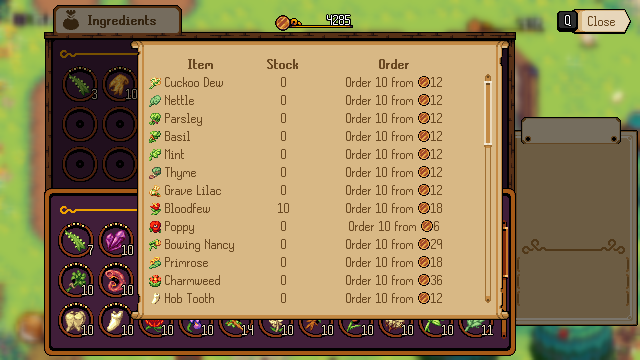
If you're short on stock you can order more.
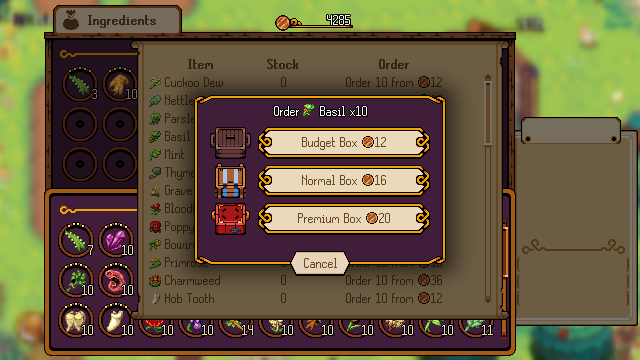
Pick what items you wish to order from the list and wait until the delivery day. The items will be dropped off into storage.
The more expensive the box you order, the higher the quality of the items inside.
